 This STEAM bonus will instruct you on creating your own self-watering seed starter. Plant indoors at home to start your own favorite veggie to transport outdoors once the frost is no longer a threat.
Materials
- A trusty grown-up
- Planting soil. Make sure you purchase this or ask a green-thumbed neighbor for a scoop to use. While possibly viable, regular soil from outside might not have enough nutrients to feed your tiny green friend.
- Scratch awl, pen knife, or sharp tool for poking holes if necessary. A drill with a small bit is ideal but not necessary (get a grown-up for help and permission using this tool).
- Popsicle stick
- Cotton yarn or a skinny strip of cotton fabric
- Waterproof pen or marker
- Seeds
- Plastic bottle (an old water bottle or a 20-ounce soda bottle will work nicely)
- Sharp scissors or utility knife (again, grown-up help will be needed)
- Water
- Patience
- Sunny window spot
Method
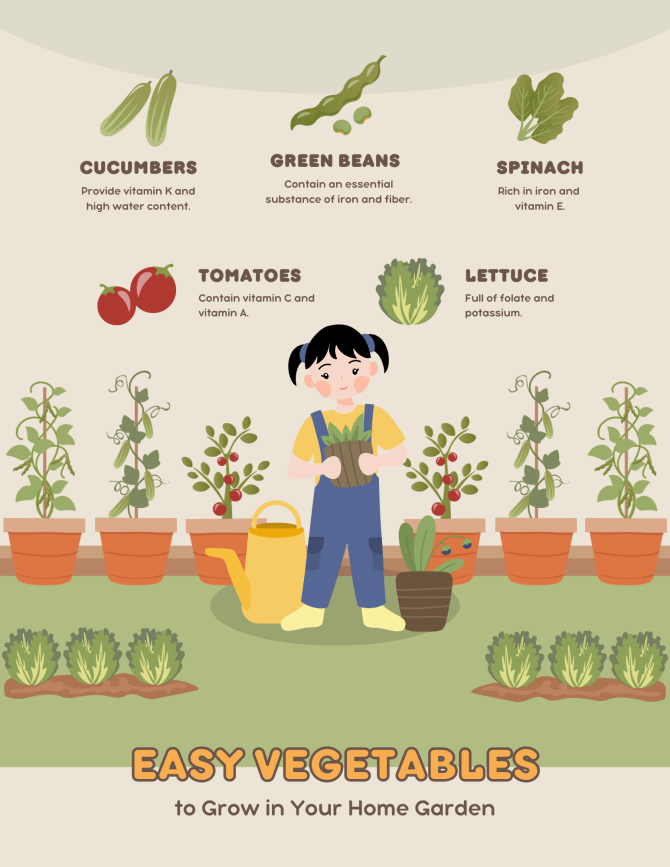
- Think about your favorite plant (or check out our suggestions in the image below) and research how it best grows. Think about the size of the area it would take to successfully grow and harvest your crop.
- Once you have decided on a plant that best suits your taste and space, visit a local hardware store or department store with a gardening supply section to select your seeds.
-
Prepare your recycled vessel.
- Remove all labels and glue from your bottle.
- Thoroughly wash, dry and sanitize your empty bottle.
- Cut the plastic bottle in half horizontally (grown-up help is recommended).
- Poke or drill a hole in the cap of the bottle (grown-up help is recommended).
- Place a few air holes right below the cut line to allow for circulation.
- Insert a length of string into the drilled cap so that it coils nicely in the bottom of the bottle and extends to about 3 inches above the cap. Fill the bottle top with the soil, making sure the string stays somewhat in the middle of the bottle.
- Place in the bottom of the bottle.
- Insert your seed into the soil (follow the seed package for how deep to plant), then cover it with soil. Water the soil slowly to ensure the seed is not disrupted and that the soil is moistened thoroughly, but not muddy.
- Place water in the bottom part of the bottle, making sure not to fill too high so the water doesn't leak out of the air holes.
- Place in a sunny spot and wait, making sure to keep the reservoir full of water.
Once your seedling begins to grow too large for this bottle, you can remove the soda bottle and plant outdoors after the last first frost date. In Canton, we are located in garden zone 6a and our estimated last frost date is April 31, 2023. After this date, it is safest to plant or move your seedling outdoors.
Notes for Success
Adult supervision is highly recommended, especially for our younger budding botanists.
Make sure the soil never completely dries out or you will have to top water to recreate the surface tension bond. This inhibits the capillary action created necessary to wick the water into the soil as it dries. If you plan to leave for a few days, use a larger container as the bottom to ensure your plant friend doesn’t get too thirsty.
For added humidity, place a second cut half plastic bottle over the seed, and voilà! You have created a tiny greenhouse.

Easy vegetables to grow in your home garden along with their benefits:
- Cucumbers provide vitamin K and have a high water content.
- Green beans contain an essential substance of iron and fiber.
- Spinach is rich in iron and vitamin E.
- Tomatoes contain vitamin A and vitamin C.
- Lettuce is full of folate and potassium.
If you are looking for more information, visit the library and chat with one of our librarians to see what we have for you to use in your research.


Add a comment to: STEAM: Create a Self-Watering Seed Starter